Tuesday, December 21, 2010

Whaaa Happened?


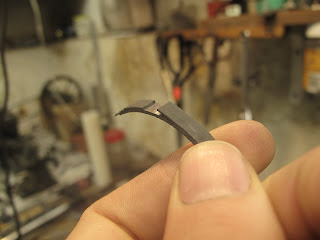
I guess that the crappy acrylic spraypaint that I used to cover the original repair to this bike was somewhat, wait, TOTALLY incompatible with my primer/topcoat system. Things were looking a bit blotch when wet, but then after the paint dried, things really looked bad. I had to sand it down 3 separate times to get this effect to go away, and then ended up just using water-based airbrush paint which was not going to react with the basecoat at all. Ugh, this is why paintjobs cost a lot. They are HARD to do well!
Posted by Picasa

Painting is not my thing


At long last I have finally gotten Jason's bike repainted. Though i got myself a nice new HVLP gun, which makes painting a lot easier due to the appropriate size and better action, this was nothing but a pain in my dirty basement. Next time I take on a painting project, I'm pretty much going to limit myself to painting things that are dirt colored, that way when the dust and lint and hair eventually percolate onto the wet paint, they'll just blend in. Ugh.
Posted by Picasa

Friday, December 17, 2010

The competition

Another company jumps on the bandwagon. Come on boys there's enough room for everyone!!

Monday, December 13, 2010

Win some Lose Some


I guess I had too many irons in the fire last night. Trying to finish Jerry's head tube as well as bake a cherry-chocolate loaf turned out to be one project more than my addled brain can handle. At least he head-tube joint looks nice.
Posted by Picasa

Best head tube joint yet

 
After trying and trying to get the perfect bleeder material that stretches just right, and absorbs enough epoxy, but not too much, doesn't leave any air bubbles etc, I think that I have finally got a combination that works. It involved some home-made release fabric and a needle and thread. Oh yeah and a vacuum bag, and a heater and an old air conditioner compressor, and a light switch and some air hose...

It's been a long battle, but I may just have found my solution. With a little sanding I expect this to be an attractive and strong joint if ever there was one. Head tubes are easy though. Next is the Bottom Bracket. Not so simple.
Posted by Picasa

Cool after effect

 
While working on a frame painting project for a teammate, I realized a bit late in the game that there was a bit of an issue with the raised surface of the original logo showing through in relief. While sanding this off, I happened to notice this effect. Too bad the final color scheme is white and blue, or I would have left this as is.
Posted by Picasa

Friday, December 10, 2010

Some new pictures of Jerry's Bike

Just posted a couple of new pictures of my teammate Jerry's bike. I've tried to push the envelope ever so slightly, though thanks to a mixup at ENVE composites, I've actually had to move back from PressFit 30 bb to a standard BB30 shell that I lightened on my finicky little lathe.

The most interesting bits are certainly the home-made dropouts since nothing that I can find fits the ENVE chainstays in the least.

Tuesday, November 30, 2010

Friday, November 26, 2010

Standard tubes


Most commercial tubes are put together with a 180/90 degree layup which is really strong against bending forces, decent against crushing, but isn't designed to specifically deal with the twisting forces often found in bikes. The down-tube in partciular has a twist-resist function as well as it's bending resistance.
Posted by Picasa

Experimenting


Looking to try some different layups with this latest batch of carbon from Enve Composites. Carl at Enve laid up a goodly set of 45 degree cross ply tubes and I'm going to use those in my next project: a road bike for my teammate Jerry. You can see that the fibers run differently from the previous picture.
Posted by Picasa

Daruma Cross Evaluation

The beta-testing phase of Daruma Cross has been pretty good. Overall, I like the bike much more than my previous too-small cyclocross frame. I think that this hits a bit closer to the mark for "excellent cross bike" than does my road bike. The bike is extremely stable, especially at speed. I'll be looking for a slightly shorter fork to hopefully make things a bit quicker at slow speeds. Ride quality is what I've come to expect from bamboo: silky. I know that low-pressure tires make a huge difference, but even with my Maxxis Mimo's pumped to 55 psi, the bike rides smoothly over road bumps and even turf. I've also decided that I must have done some things right, because I've never been quite so easily able to land every one of my running remounts. I'm also pleased that there has been zero complaint from the seatpost/mast area either. I believe stiffness to be good, though I occasionally do hear some rear brake rub. That could be partly due to flexing wheels, but it's hard to say until I switch those out for something that is known to be super stiff. I'm willing to concede a bit of stiffness for the ride quality though, it's nice not to be pitched all over creation.

Each one of the bikes that I've made for myself could be better in some ways though. I guess it really boils down to needing to get better at bike frame design. When building bikes for myself, I tend to follow my standard recipe technique: look for all of the things that I think are cool, try to slap them all together, and then throw a bit of experimentation in for good measure. Ask anyone that's tried my cooking.

In both of these bikes, I made some really long top-tubes to help accomodate for my preferred mid-foot cleat position. In the case of my road bike, I was pretty much spot-on with the length, but a slight miscalculation in which forks were available to me, left me with a steeper-than-desired headtube. It gets a little quick steering, though still within reason, until you're going at speed. My other miscalculation has more to do with a lack of understanding of the inherent flexibility of bamboo. I got all artsy with the seat stays and picked some nicely re-curving sections, but at the end of the day, I really probably should have gone with some stouter bits to boost the rear-end stiffness a bit.

As far as my quibbles with the D-Cross, it seems that I could have made the top tube about a centimeter shorter, and probably could have done something similar to the chainstays. My design goal was really to make something that would absolutely not have any toe overlap, and given my big hooves and mid-foot cleats, this required some extra length in the front end. I was prepared to run a shorter stem as a result, and I suppose that a 100mm stem is not really short, but I think that I could have easily gotten away with the shorter overall length. I think the next couple of bikes I do will be a bit more stock geometry, so that will help me get my design mojo going a bit: being able to tweak a known quantity is probably a better way to learn than winging it repeatedly.

Dimensions for Daruma Cross:
HTA: 72 deg, should have gone to 72.5 with the fork that I'm currently using. Will look to change that once I can afford a new one.
STA: 73 deg, but who knows with the curvy seat tube that I ended up using. Seems more like a 74 or 75 up towards the top. Fits perfectly though.
BB Drop: 70mm
ST: Virtual 590mm
HT: 180mm
TT: 605mm
CS: 425mm

Friday, November 19, 2010

This just in...

 
Bigfoot was spotted riding his cyclocross bicycle at Belmont Plateau in Philadelphia yesterday evening at approximately 7:30 last night. No clear footage was available, but we got this grainy photograph to prove that he was there. Enjoying himself immensely.
Posted by Picasa

Daruma Cross emerges from the shadows


Ok, Ridiculous to take photos of one's bike at night. But I couldn't resist.
Posted by Picasa

Tuesday, November 16, 2010

 
Posted by Picasa

Some pictures up

Flickr pictrs of some more bike stuff are up.

Click the link and check out "My Cross Bike"

Monday, November 15, 2010

Frankencross

I cobbled together the cross frame into a bike on Saturday to give it a test run around the 'hood and to see if there were any tweaks that I needed to make before spending hours and hours sanding and painting.

Turns out, as to be expected, there were. Firstly, I'll say that the bike rides pretty well. It fits nicely, and has cured the dreaded toe overlap issue that plagued my other cross bike. Big feet plus wacky cleat=problems with toes getting rubbed off.

The second thing I noticed was the lack of rear brake stiffness. On the SuperCommuter that I built for Dave a year or so ago, I wrapped the heck out of the seatstays around the brake bosses in an effort to keep things really sturdy. It worked really well there, and with the through-the-tube brake cable, made for some really top-notch brake action. With this bike, I had some issues with flex after my much lighter layup schedule on the seatstays. The braking was a bit on the mushy/ineffective side for my liking, so I ended up taking off the brakes and putting another 3 or 4 layers of unidirectional stuff in both spiral and longitudinal patterns around the stays. I am going to finish putting it together tonight, but overall I'm liking how things are looking at this moment.

I'll put up some pictures after I de-weirdify it a little more.

Wednesday, November 10, 2010

Brakes


Brakes, straight out of the bag. Much finishing to be done yet, but things are getting there. I've done a lot of sanding since this time, but it is still looking a little rough. More sanding is in order.
Posted by Picasa

Philly Bike Expo

So I let Mike from Trophy Bikes talk me in to bringing my bike to the Philly Bike Expo on the 30th and 31st of October.  Overall the show was a great success, lots of good exhibitors from the Philly area and elsewhere, and lots of cool bike stuff to look at.  The best part about bringing my bike there, was that I got a ton of props for it.  The worst part about bringing my bike there is that now all I want to do is be a framebuilder.  Ugh.  If I didn't have such a large amount of money invested in my education (and the loans to show for it) I'd be doing bikes full time. 

I love these sorts of shows because they're full of people who make things, and those who love the excellent products.  I had a good chat with a guy from Houston named Tim Massengill, who makes some really nice looking frames from steel, and to my excitement, some equally cool ones out of carbon fiber.  Check his stuff out here.

Budd Bikeworks

One of the most interesting guys there was the dude from Budd Bikeworks with a couple of his steeds.  While he works exclusively in steel, I like the design philosophy of "make it and see how it turns out"  Check out the website here:  http://www.buddbikes.com/

Massengill break-apart frame

Posted by Picasa

Seat tube joint on break-apart frame

Posted by Picasa

Wednesday, October 20, 2010

New methods


I've started to get the hang of working with my silicone mold-making material, though it's not quite as foolproof as I had hoped, I think that once dialed in, it will give me some better results with less work. So far, however, it's been equal results with more work. Probably going to have to take a wait and see attitude here though.
Posted by Picasa

Thursday, October 14, 2010

Hope that angle is right


I've started and stopped this project a number of times, so in the end I hope that things work out the way they're supposed to. It took me far too long to figure out the appropriate spacing for the jig based on the BB86 bottom bracket that I'm going to try to use on this one. I think that a major advantage of the BB86 for cyclocross is the potential for increased mud clearance up front. Last year's Gary Fisher something or other cross bike had some wicked clearance built in as a result of the integrated BB.
Posted by Picasa

Star Crossed


This is probably going to get finished a bit too late for cyclocross season this year, which is probably fine, since I've definitely not got the fitness or the time at the moment to do much in a race. I'm trying out my new improved assembly method, and am finally getting pretty solid with the mitering, so that is a welcome change. I've opted not to go with the tapered fork that I was hoping for, since it's simply too much pain to try to get one this year. Maybe for a future project I might consider it. I will likely try to get one of the new TRP shorty V brakes for the front to try to eliminate any fork shudder. If I can find a CX fork with disc tabs, that might be a pretty cool option as well.
Posted by Picasa

Thursday, October 7, 2010

Brompton fail

The 2010 Brompton World Championships are now over, and were kind of a bust for me. I was feeling pretty speedy, had a good fold, and a nice first lap, but unfortunately didn't really have the luck as I flatted halfway through lap 2. Bummer. I was hoping to do the stars and stripes proud, and it wasn't easy to bear the weight of a nation on my shoulders like that. But hey, that's bike racing for you.
http://www.brompton.co.uk/bwc/2010/

Thursday, September 16, 2010

The itch

Totally jonesing to build a new bike. I just got a new tool post for my mini lathe, and I could not be happier with the results from that investment. It cuts, it faces it knurls, and all with much more rigidity and precision than the little runty thing that I've been using thus far. Fabulous.

I've got about 3 bikes in mind for the coming months, and I constantly wish for more time to work on them.

Bike one: potential custom frame for a bike club friend of mine. Could be cool. He's deciding on whether or not to make it a track bike or a road bike. I'm kind of hoping that he'll want a track bike, since I haven't had a chance to make one of those yet.

Bike Two: cyclocross frame for myself. I have long thought that Bamboo would be ideal for CX since it soaks up so much vibration. My hangup here is that I would want to run a tapered headtube, and I don't have a source for that yet. None of the aftermarket fork manufacturers currently offer a tapered steertube CX fork. I was also thinking that I could go with something with an aluminum steerer to avoid excess brake chatter and frame flex, but I don't know if I want to bother if I can't do the type of job that I want.

Bike 3: actually two bikes for a guy that I met through the bike shop. He has in mind some sort of upright dirt trail bikes, a matching (kind of) set for him and his wife. This project will develop a bit over the next few months I think, but I'm looking forward to trying to build two of the same thing.


Monday, September 13, 2010

Some Advice on Bamboo

Selecting bamboo: For most of the stuff that I've found around here, the best pieces are the sections closest to the ground to about 6 feet up. These have the thickest walls. Go for wall thickness at least 5 mm for main tubes, 3.5 to 4 for things like seatstays etc. The major issue with bamboo is not so much the actual break strength, but the flexibility. It's not so stiff, which is why I've done most of my bikes with carbon bits. The other issue for you will likely be finding exterior diameters that are appropriately sized. The outside fibers of the culm are the strongest, and so it's not a great idea to whittle those away too much to fit it inside of a lug. The other thing, is that there aren't any dead straight pieces of bamboo in the world, they all have some deviation to them, making it a bit more interesting to find the right size/shape. This works fine with my construction methods, but I am guessing that you're planning on taking a stab at a bike somewhat similar to the Panda Cycles model.

As far as the treatment goes, I followed a process somewhat like that in the bamboo forums website: heat treat with a blowtorch when green, then air dry for several months, or torch first and then 2 hours in the oven at about 200 degrees. Some pieces will crack for sure with this process, but that's just part of the game, better crack in the oven than on your bike.

When torching, you'll see the color of the outside change, it'll look like it's fading in sudden increments. Oil will also rise to the surface at this point, so you should wipe this off with a rag. Once cooled and dried, i take a razor blade and scrape off the outside of the bamboo, mostly for aesthetics, but also because epoxy doesn't stick to the waxy skin.

For bonding bamboo to other stuff, make sure to sand the joint and wipe down with some acetone or similar to remove excess oil. I use the West Systems Six10 glue because it's cheap (ish) and strong as shit. 3M DP 420 is supposed to be the best, but it's super expensive, and for my purposes not so necessary.

Thursday, August 26, 2010

Status: busy

But not with building bikes. I've done a couple of repairs in the past month, and am really getting a lot faster overall, but have to figure out the whole painting thing. I've been looking into new sprayguns and the like, and will probably settle on something in the $100-$150 price range rather than go with another cheapo. I'm going to need all the help I can get now that I sprung for some serious paint. I got a quart of Deltron clearcoat and hopefully will find a way to put it to good use. I was looking for something a little bit harder than the $40 per quart Omni stuff that I'd been using, since bikes tend to get beat up a fair bit, I can use all of the toughness available. The Omni gives a pretty good finish, but it's a little bit soft, particularly when compared with the high quality factory finishes that I find on the bikes that I've been repairing. This makes it easy to buff out my mistakes (a decided plus) but sometimes the different levels of hardness show transition lines a bit too much between the original and the repair.

Tuesday, July 27, 2010

Goddamn recyclers

Nightmare scenario-

Since I'm still working a day a week at Trophy, I've been using that as a 'reliable' place to ship stuff, since they're always open during delivery hours. Last week my Dad shipped a bike from a customer of his who had broken the frame. It arrived on Wednesday, and I stopped by to check out the box. Things seemed to have arrived intact, the frame would have been an easy fix, probably one of the easier ones I've done. I hung out at the shop a bit on my lunch break, and I opted to leave the frame at work to come and get later. It was still in the shipping box, which was in the area of the floor where boxes are often received from the shipper. I knew that it would have been better to take it with me, but it was raining and I had to get back to my office job, so I left it.

On Friday I came by the shop to pick up the frame, and couldn't find it. Not entirely unusual, since things get moved all the time over the course of the day. I asked around, and nobody had any answer. I though that it might have been taken to the basement, so I checked there. Nothing. I checked in the the storage room, the bathroom, the pile of boxes outside in the dumpster, the dumpster itself and everywhere I could think. I called all of the other employees, I had them go to look in case I am blind. Nothing. The frame was gone. No one had any idea of where it might have gone. We only knew that it was gone.

The current theory is that the frame was picked up on that Wednesday, like 2 hours after it had arrived by the recyclers. It was still in a box, but it boggles the mind to think that they would have decided that an open box with a frame sticking out of it was garbage. I have no idea.

I would have felt pretty pissed if it were my own stuff, but this was not even mine, and though it was in my care, I had no actual hand in its demise. What a crap deal. I've offered to make appropriate reparations to the owner, and am still waiting to figure out what we're going to do.

Goddamn recyclers. Get your stoner asses together!

Saturday, July 17, 2010

Repair Season

I've been busy doing some repairs. I have the benefit of a team full of guys who love racing, and sometimes crashing their bikes. This is a recent one referred by a friend. The seat stay was completely blown out, and there was another crack as well in the seat stay from the flexion of the break.


I've also just managed to replace Jennifer's downtube. I'm finally getting the hang of laying down a nice finished carbon layer for aesthetics. I did a good job with that on my dad's bike, and have started perfecting it now that I've got some thinner silicone sheets.

Wednesday, June 2, 2010

Tuesday, June 1, 2010

Test Report: Daruma Cycles Super Awesome Custom for ME!!

I had meant to post a quick first impressions of my bike when I first put it together 3 weeks ago, but never got the chance. Here is my moderately extended test in the style of modern bike reviews:
Geometry and handling
I designed this bike custom for myself, and that means accommodation for two things: 180mm cranks and an arch cleat position. To accommodate for these fit features, I made the top tube longer than my normal 59 cm and the bottom bracket slightly higher. I also moved the rear wheel as close as I could to the bottom bracket, the wheelbase is about 40 cm. Head tube angle is 73.75 with a 43mm fork rake, making the front end stiff, light and quick. Tubing for the bike follows my current formula of carbon head tube, down tube and chainstays. The downtube is an oversized 2 inch tube that I got on super discount from ACS composites. A bargain, and totally suited to excellent road bikes.

Build Kit
I built the bike up with a great deal of parts that I've obtained over the years, along with some new bits of componentry to complement the unique features of the frame such as the 1.5 to 1 1/8 headtube and the BB30 bottom bracket. The fork is an excellent Edge Composites tapered steer tube model with full carbon dropouts. Light and totally easy to deal with. Edge has my eternal respect. In early April I ordered up a set of Lightning carbon cranks and eagerly waited for them to come in. Then I waited some more, called them to hear that the cranks were still 2 weeks from production, then I waited some more, then I called them, and they said another week, then I put up a stink, and then waited another week, and then I finally received the cranks. While waiting through the terrible customer service at Lightning, I decided that I could wait no longer and purchased a BB30 to English bottom bracket adapter and decided to build the bike up with my Rival cranks.
Other items in the build kit include:

Campy Veloce Shifters
Chorus R. Der
Record braze on F. Der
Cane Creek AER headset
Wipperman Chain
FSA seatpost
Flite Saddle, recovered in leather that I snagged from a sofa left on the curb for a week.
Easton EC90 Bars
Cannondale C4 stem
Origin 8 super light brakes
Lightning carbon cranks

Overall, the build suited me just fine, which makes sense, as I picked all the parts. It took about a week of fiddling to figure out the fit with the new geometry, but it feels great now.
The wins: I love the ergonomics of the new Campy shifters. They're really comfy with great actuation on the brake levers. I am also totally impressed with the Origin 8 Torq Lite brakes. They work well, are super light and look great.

Here are my list of gripes with the parts: The EC 90 handlebars are not really the optimal shape for me, as I prefer a standard round drops, but they're stupid light and I got them for free. I picked the AER headset because it's again ridiculously light and I got it in a trade, so didn't need to pay for it directly, always a way to get more than you bargain for. My problem with the headset is that given the aggressive geometry of the front end, there is a bit too much stiction in the steering; particularly since at first I had allowed the teflon bushing to slip out of alignment somehow, making for the worst headset experience ever, too tight or too loose but nothing in between. After re-seating it, things improved greatly, but I still get a slightly unnerving sense of hesitation in the steering when going solo on straight courses. I'm planning on switching the top portion with the teflon bushing for a ball bearing unit this week to see if there is any noticeable difference. We shall see.
My last gripe is with the 2008 Campy shifting mechanism. Apparently there was an initial batch that had a less positive feeling ratchet design. Basically the upshift to easier gears feels pretty mushy and has not been very consistent. They have replacement guts that would do the trick, but I have not yet bought and installed those.

The finish
What can I say, I did an excellent job here. Metal flake brown, Bazooka Joe pink and raw carbon, plus walnut-brown tinted bamboo. Looks pretty damn good, as long as one is willing to concede that pink is indeed a manly color.

The ride
After about 250 miles and 2 races including one 77 mile Tour of Somerset County through some of the more scenic but less well paved roads of NJ, I can truly say that this is a comfortable bike. A ridiculously comfortable bike. Perhaps it's the combination of the A23 rims and nice tires, but the road vibration is almost imperceptible through the bamboo. Part of this may be my design: I used some light(ish) weight curved bamboo segments for the seatstays, and a full bamboo seattube, but I think it's just the organic nature of the bamboo that keeps things smooth.

Additionally, the oversized fork, headtube and downtube along with the BB30 setup produce a solid feeling of efficiency that I can't quite figure out. On one hand there is minimal road feedback, but I seem to be able to sprint with aplomb and the balance of the bike is really good. I need to build up Pinky, my Cannondale to compare head to head again. I have the feeling that the Bamboozle is nearly as stiff in the ways that count as Pinky, but I need to ride them both in the same day to figure out the truth. Hard to quantify the sensations of riding it: my current analogy is to compare the feel to listening to the radio with the treble and mids turned all the way down. It's like all of the high pitches just disappear. I have yet to send the bike out under other riders of different stature to see what they think, but I will do that for sure once I get the steering and shifting issues worked out. For me those two things really distracted from enjoying the ride for the first week or so, and I had a terrible time thinking of how nicely the frame rode in comparison to the shifting and steering problems I was having. Now that those are mostly sorted out, I'm having a much better time riding, and am truly looking forward to getting some results on one of my bikes.

If I were a bike magazine I would write the following about the DC4:
Pros: Unique frame, with uniquely comfortable ride quality.
Cons: Strangely compliant rear triangle makes it hard to quantify power output from the mere sensations of riding. Steering not as good as with a standard headset.

Buy If: You are looking for an awesomely comfortable bike that no one else has.
Avoid If: You want the lightest, stiffest bike out there.


Wednesday, May 19, 2010

Drop Box


Finally built up. This is the picture that I took in case I crashed on it first race. Despite some of the best efforts of my peers, I am unscathed and so is my bike.

Tuesday, May 4, 2010

Dammit!

So I started putting my bike together last night, and things were looking good until I attached the rear brake. Then,I rather quickly reaized that I made the brake arch ever-so-slightly too high. The damn rear brakes don't reach! I measured a gazillion times and it seemed to be the right height.

Dammit.

I will try to re-drill the brake hole at a slight angle, which should put the brake at an appropriate height, if at a little bit of an odd angle. My fingers are crossed.

Monday, May 3, 2010

New Wheels

Ever since I read about the HED Bastogne wheels last year in Cyclingnews, I was intrigued by the idea of a wider rim width, and I finally had a chance to put a set to the test.

I was determined to get a set of the totally cool, totally new Velocity A23 rims, and I ordered up a pair last week. As per usual though, it was to be a wheelset with my standard klugey sensibilities. I inherited a broken Bontrager Race Lite tubular wheelset, with a damaged rim and some tweaked spokes, but otherwise A-OK. These are paired spoke wheels, however, so I knew that building the wheel to a standard-drilled rim would be odd, though not necessarily unstable.

I built up the set last week, the front being no problem whatsoever, as it was a simple radial lace with a standard 24 hole setup. The rear was a bit tricky, but worked out surprisingly easily. I was able to build up the wheel using some of the existing bladed spokes (DT Aerolites no less) by switching the non-drive spokes of the deeper Bontrager wheel to the drive side and then picking some new non drive spokes on the left. Easy enough. Then I just tensioned and trued as normal, and with some minor pain was able to make a straight enough wheel.

I took them out for a ride last night with about 85-90 psi in the tires, and they were good, really good. Smooth, just as you'd expect, and they accelerated well with some pretty amazing traction up the steep little kickers that I found on a golf course trail. It was good stuff, and I'm looking forward to putting them on the new bike, once my damn cranks arrive that is!

Friday, April 9, 2010

Still can't paint, but I can polish

I still can't paint a level clearcoat to save my life, but I have been able to buff out most of the orange peel.  I know that there is a bit of an equipment issue here, a $30 spray gun from Lowes is simply not going to give me the best results on an intricate painting project like a bike.  I would also do a better job if I could stand fully upright in my basement, or heck, even build a real paint booth.  both are going to have to do for the next couple of years though.  Ugh.  

I've spent probably 4 hours wet sanding the frame and getting the texture out of the paint, and another 2 in buffing it.  Maybe I'll call it done and get some pictures taken this weekend.  That's the plan at least.

Thursday, April 1, 2010

Clear solution

I am one coat of clear away from finishing my own personal road bike, and then only a mere crankset, bottom bracket, shifters and brakes away from building the thing up. I'm waiting on a couple of external things, notably cranks. Since I've gone with BB30, and I'm kind of addicted to my 180mm cranks, there are a couple of options I could go with. The best, or at least lightest/most efficient would be using Lightning Cranks. Their website is pretty terrible, but they seem to have done an excellent job of designing a light weight, BB30 compatible product. Expense is the only thing holding me back here though, as they're roughly twice as expensive as my other best option, the SRAM Red cranks which are pretty light and available in 177.5 mm length. Would I notice a difference of 2.5mm or an extra 100 grams of weight? Who knows, but the Red's aren't available until May 10th at the earliest, and I don't know if I can wait that long!!
My other option is to get an adapter for the BB and swap over my 180mm Rival cranks that I've been riding for the past year, with the eventual hope of getting myself some wicked cranks as time goes by.

The frame itself is looking good, and I'm hoping that all of the minor details that I'm sweating in the finish work right now will pay off in the end and melt away in the final finished bike. My goal is to have it ready by my first race, but I'm doubtful that that will happen, as I've got a lot of stuff on my plate with other projects and job stuff these days. I think that the best case scenario will have me putting things together by the end of April. With luck I'll be able to race my bike at Turkey Hill, and maybe even finish the bastard this year.

Tuesday, March 16, 2010

I'm totally into vinyls

I just got back some vinyl cutting that I had done by Signs of Art here in Philly. Louise, who owns and runs the shop, is married to a co-worker of Jennifer's at her old job at PPV. I had been hunting around in town, trying to find a sign shop that actually answered their telephone, when Jennifer reminded me that we kind of knew someone who did that stuff.

A series of emails ensued, and 4 days later I had graphics in hand for $20!!! I couldn't believe my good fortune. I picked up the stencils yesterday, and couldn't contain myself. I went promptly home and finished up the rest of the color coat on my bike! That went pretty well, but I still need to figure out the timing of applying the various stages of paint. I think that I've been rushing the whole masking process too much, but that's kinda what I thought I was supposed to do: pull off the masks before the paint cures too much and risks cracking. I applied the stencils about 25 minutes after the first color coat, which seemed to go OK, then I painted the rest of the color for the background. This too seemed just fine, though when I removed the stencils at the end of the process, they had somehow glued themselves to the pink base coat. Bad news. I tried to get things to come off evenly by picking at the edges with my exacto knife, but in the end I had to stop because there was simply no stopping the paint from peeling off. Annoying. The other problem is that there was some adhesive left from the stencils, and though it is clear, it's a little bit sticky and sanding dust jumps right onto it. I'm not exactly sure how I'm going to deal with the issue, probably just clearcoat over it soon to prevent it from getting gunked up and hope for the best.

Bird shit

About a month ago I went to my local bamboo grove in search of some nice new culms before the growing season got underway and the bamboo became waterlogged. I didn't have the trailer with me, so I just cut them and left them to dry. Several weeks went by, and then it snowed, then thawed, then snowed again, then I never had a chance to get them, so I did that this past Sunday. It had been raining, and I didn't want the cut bamboo to get moldy, so I decided to drive up there in the car and load them up en masse. This went pretty well, and I honestly shouldn't need any more bamboo for a couple of years, so prolific was my harvest! One of the side effects of the snow was that it caused a massive blow-down in the bamboo grove; many of the taller shoots were busted off half way down, and an even greater number were simply bent in half. I didn't cut any new bamboo shoots this time, only newly broken ones.

The major issue was that this particular bamboo grove is some sort of bird super-condominium, it must be the favorite hang out for an enormous flock of birds. How would I know this? Because where birds hang out, birds shit. I'm truly glad I won't have to go back for a while as I'm pretty much done hanging out in a dense grove of bird-doo enslimed bamboo. The rain made the bamboo slick with the droppings, and I was able to wash off some of the culms, but not all, and not my jacket. I was thoroughly gross by the end of the trip.

Strange side benefit however: handling all of the bird-poo-bamboo (say it five times fast) for a couple of hours did something marvelous to my hands. They are the softest that they've ever been. Maybe I should look into that more.

Tuesday, March 9, 2010

Awesome Fenders

Banjo Bicycles out of Madison had what was probably the coolest set of fenders that I've ever seen on this bike. The rack wasn't too shabby either.
Posted by Picasa
Some elegant but slightly non-functional brakes.
Posted by Picasa